Every spring, our team at Proof Response gets called into basements that could have been saved. The culprit is almost always the same thing: a sump pump that nobody checked. If you live in Canada, sump pump maintenance is not optional. It is one of the most important things you can do before the snow starts melting.
Think of your sump pump like the drain in your bathtub. When everything works, you never think about it. But the moment it fails, water goes everywhere fast. A few simple checks each season can keep that from happening to you.
Approximately 1.5 million Canadian households, representing about one in every 10 households, are highly exposed to flooding. A maintained sump pump cannot prevent every type of flood, but it can provide an important line of defence against groundwater and drainage-related basement water.
Why Sump Pump Maintenance Matters Before Spring
Spring thaw is the most dangerous time of year for Canadian basements. Frozen ground cannot absorb snowmelt, so water has nowhere to go except down. It collects around your foundation and puts enormous pressure on your basement walls and floor.
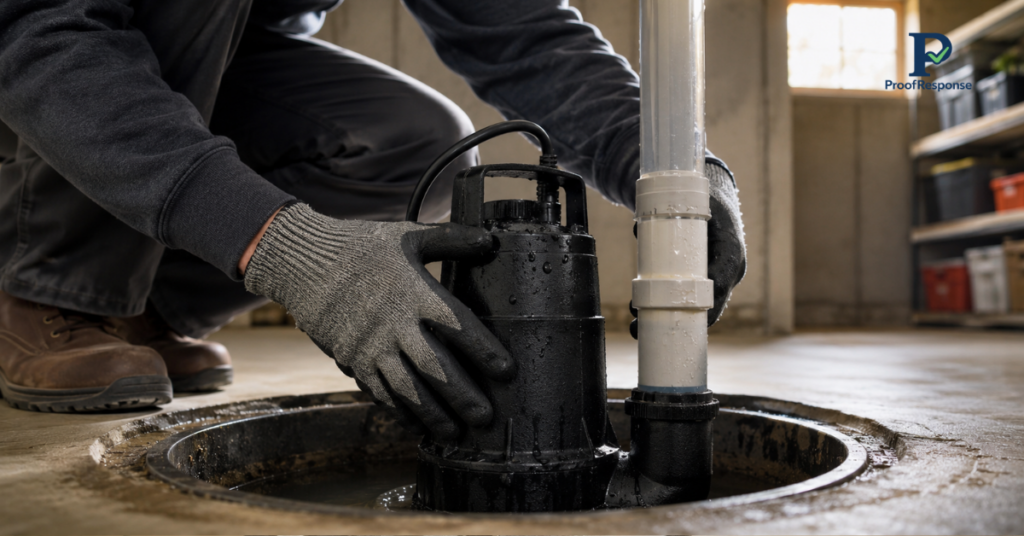
Your sump pump sits in a pit at the lowest point of your basement. Its job is to collect that water and pump it safely away from your home. If it is clogged, burned out, or simply untested, spring thaw can turn into a flooded basement in a matter of hours.
We have seen homes with six inches of water because a pump seized up after sitting idle all winter. A 20-minute check in February can save you thousands in water damage repairs.
Your Pre-Spring Sump Pump Maintenance Checklist
Walk through these steps in late winter or early spring, before the ground thaws. Take photos at each stage, so you have a record for your home insurance if you ever need it.
1. Test the Pump First
Grab a bucket of water and slowly pour it into the sump pit. The float (a small ball or arm) should rise with the water level and trigger the pump to turn on. If nothing happens, your pump needs attention before spring arrives. This is the single most important step in the whole checklist.
2. Clean Out the Pit
Over time, gravel, dirt, and debris collect at the bottom of the sump pit. This gunk can clog the pump intake and make it work harder than it should. Use a wet-dry vacuum or a scoop to clear out anything that does not belong. While you are down there, photograph the inside of the pit so you have a before-and-after record.
3. Check the Float Switch
The float switch tells the pump when to turn on. If it is tangled, stuck against the pit wall, or just worn out, the pump will not activate when water rises. Lift it by hand and make sure it moves freely in all directions. This is a two-second check that is easy to skip and easy to regret.
4. Inspect the Discharge Line
The discharge line is the pipe that carries water away from your home. In winter, it can freeze solid or get blocked by ice at the outdoor opening. Check both ends: the connection inside your basement and the exit point outside. Make sure water can flow freely. A frozen discharge line is a common reason pumps fail in early spring.
5. Look at the Check Valve
The check valve is a small one-way gate on the discharge pipe. It stops water from flowing back into the pit after the pump shuts off. If it is missing or broken, your pump ends up cycling on and off repeatedly, wearing itself out quickly. Look for a flap or a valve on the pipe above the pump and make sure it is secure.
6. Confirm Power and Check Your Backup
Most sump pumps are plugged into a standard outlet. Make sure the cord is not damaged and the outlet is working. Even more important: do you have a battery backup? In Canada, spring storms often knock out power right when you need your pump most. A battery backup unit can run the pump for hours during an outage. If you do not have one, consider it a worthwhile investment before this spring.
Document as You Go: A Quick Photo Checklist
Taking photos during your sump pump maintenance is a habit that pays off. If you ever make an insurance claim for water damage, adjusters want to see proof that the pump was maintained. Here is what to photograph:
- The inside of the sump pit before and after cleaning.
- The pump is running during your bucket test.
- The discharge line exit point outside your home.
- The check valve and float switch.
- The date and time stamp on each photo.
Store these photos somewhere easy to find, like a folder on your phone labeled “Home Maintenance.” You will thank yourself later.
Make Sump Pump Maintenance a Spring Ritual
Staying on top of sump pump maintenance is one of the easiest ways to protect your home from water damage. It does not take long, it does not cost much, and it gives you real peace of mind when the snow starts melting and the rain starts falling.
Make it a habit. Put a reminder in your phone for late February. Walk through this checklist, take your photos, and head into spring knowing your basement is protected.
Already seeing water in your basement after the thaw? The Proof Response team can help you find the source and stop it fast. Learn more about our basement leak after snow melt response service.